DAW View
The main timeline where you build songs from MIDI and audio clips, each track driven by its own instrument rack.
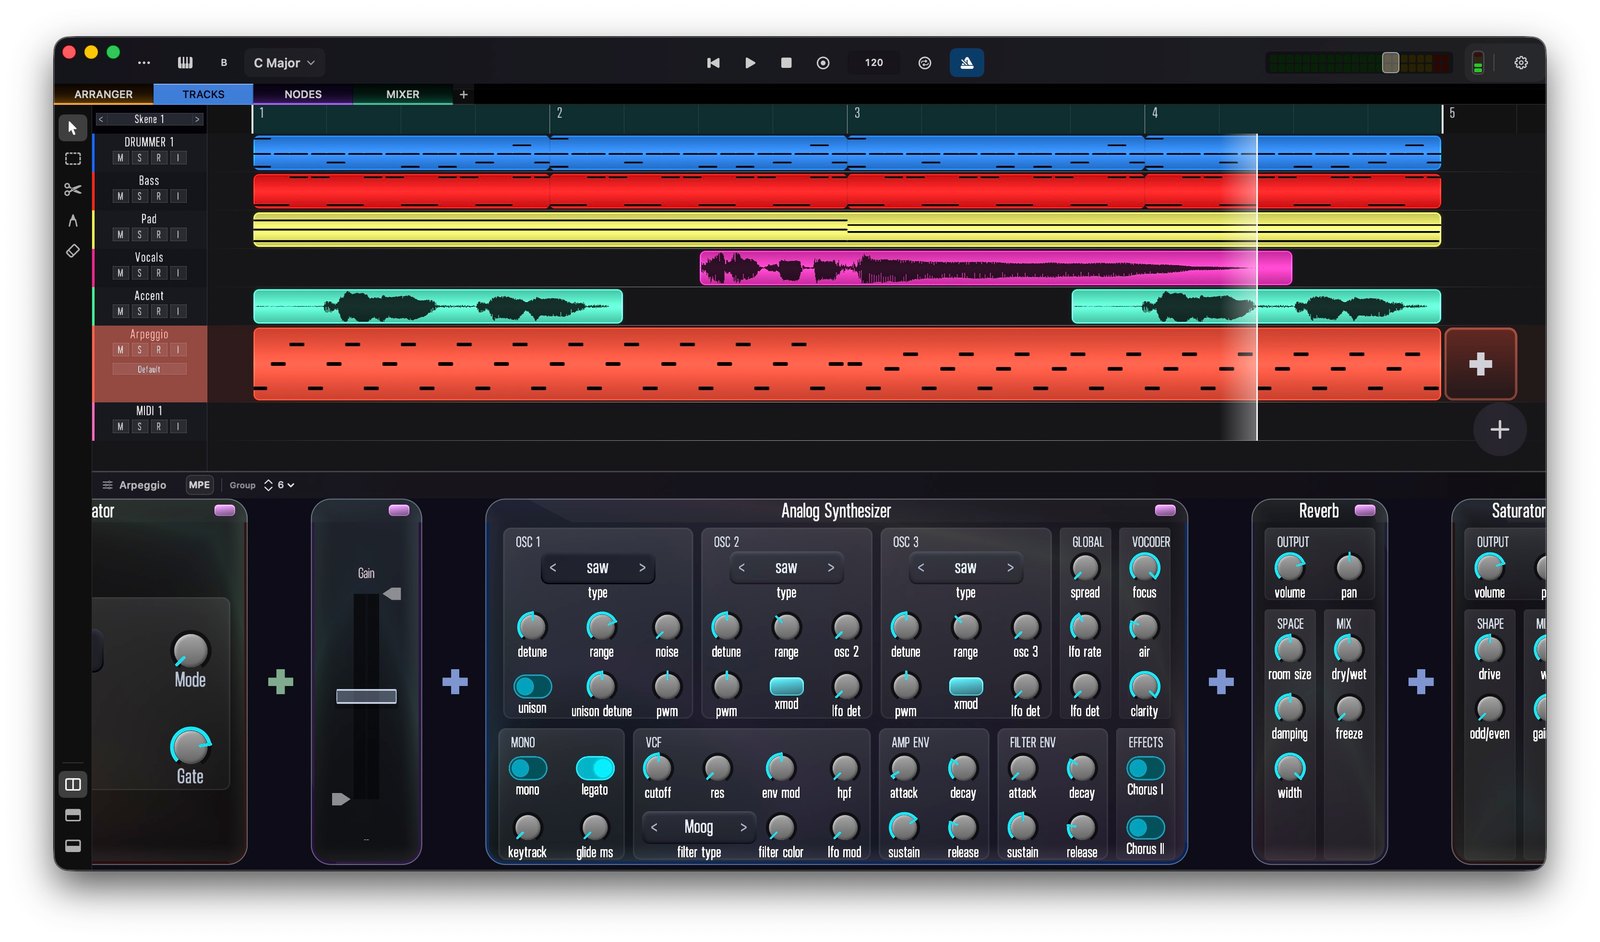
The DAW view (the Tracks view, 2) is the heart of Skene. It’s a clip-based timeline: each track holds clips arranged along the beat grid, and each track is powered by its own instrument rack. Press 2 from anywhere to return here.
Layout
The DAW view has two panes that work together:
- The track view — your tracks stacked vertically, with their clips laid out along the timeline.
- The detail view — opens below (or fullscreen) to edit the selected clip: the piano roll for MIDI, the waveform for audio, or the drum editor for drum patterns.
Move the selection between clips and tracks with the arrow keys, press Cmd + ↓ to drop into the detail view, and Cmd + ↑ to come back. See Keyboard Shortcuts.
The instrument rack
Every track has a rack: an instrument (a built-in synth or sampler, or a hosted AUv3 plug-in) followed by any audio effects. The two faders flanking the rack are the most-used controls:
- Left fader — the track’s MIDI velocity / input gain.
- Right fader — the track’s main output volume.
You can add effects to the rack inline — see Rack & Effects.
In this section
- Creating Tracks — add MIDI, audio, and drum tracks.
- The Piano Roll — draw and arrange MIDI clips.
- Clip Editing — repeat, resize, and loop clips.
- MIDI Note Editing — tools, selection, velocity, and quantize.
- Key & Scale — lock playing and editing to a musical scale.
- Automation Curves — modwheel, sustain, and CC automation.
- Rack & Effects — build a per-track effect chain.
- Audio Tracks — record and play back audio.
- Drum Tracks — pattern-based drums with the drum synth and sampler.
- Multi-Track View — see every track at once.